DIY Easter Centrepiece
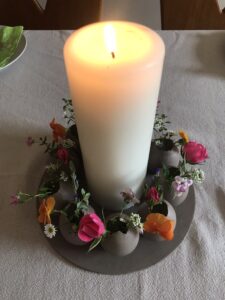
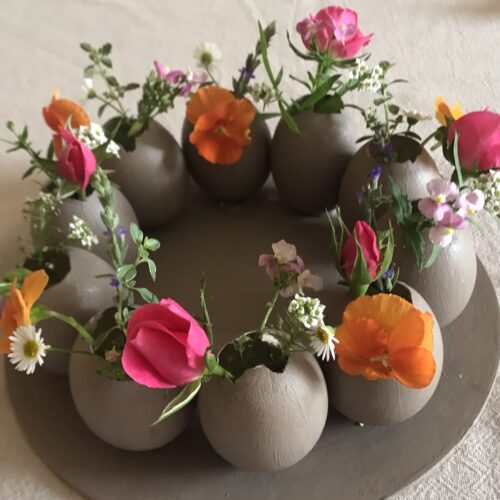
A charming Easter centrepiece made from real eggshells, painted and arranged with fresh flowers for a rustic farmhouse feel.
Equipment
- Hot glue gun and glue sticks
- Pencil
- Paint Brushes
- Kebab Sticks
- 1 Knife
- 1 Small nail scissors
Ingredients
- 10 - 12 large eggs collected when baking
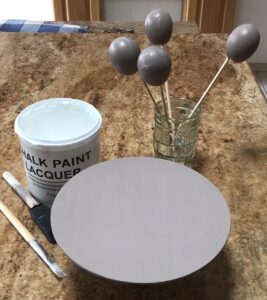
- Annie Sloan Chalk Paint in Coco or colour of your choice
- Annie Sloan Chalk Paint Lacquer
- 1 round wooden circle (20cm) available at craft stores
- Double-sided foam squares
- Fresh flowers from the garden
- 1 pillar candle
Instructions
Prepare the Eggshells:
- Gently wash and dry large eggs.
- Using a sharp knife, make a small hole at the top of the egg. Carefully chip away the shell bit by bit until the hole is big enough to pour out the contents.
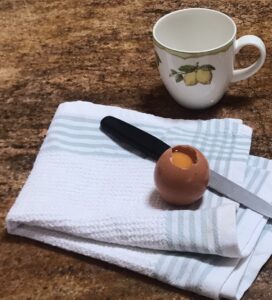
- Save the egg whites and yolks for baking something delicious.
- Thoroughly wash the inside of the shells and allow them to dry.
- Break away the top of each egg to create approximately a 2,5cm opening for your flowers. - Tip - you can carefully cut the eggshells using a small nail scissors.
Paint and Seal:
- Coat the eggshells and the wooden circle with chalk paint using paint brushes. I used Annie Sloan’s Coco—a rich, earthy hue that’s perfect for a rustic look.
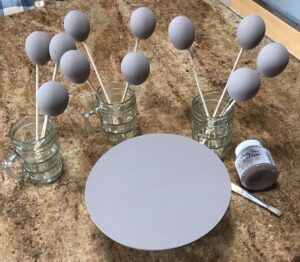
- To make drying easier, place each painted egg upright on a kebab stick propped in a cup.
- Let everything dry completely.
- Apply a layer of chalk paint lacquer to protect and give a subtle sheen.
Layout and Attach:
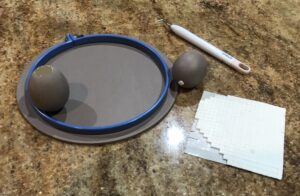
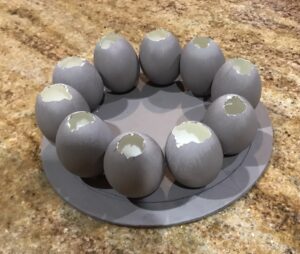
- Lightly sketch two pencil rings on your wooden base—a smaller inner ring and a larger outer ring—as a guide for placement.
- Use double-sided foam squares to plan and space your eggs before final gluing.
- Once satisfied with the arrangement, glue each egg into place using hot glue.
Decorate:
- Tuck tiny seasonal blooms—like daisies, lavender, or wildflowers—into each eggshell.
- Place a pillar candle in the centre for a glowing, magical finish.